Annotation plays an important role in highlighting and labeling every aspect of a given presentation. With a vast number of images shared in the internet, annotation is the key to provide notes and highlight the characteristics and qualities and/or imperfections of the photos. Images were first annotated with text descriptions and tags. However, text annotation in images can be tough since results may vary and keywords may be difficult to categorize. Now we have a better tool in annotating images, this is by drawing a box/rectangle or polygons to emphasize certain imperfections, edges and boundaries of the given image.
With our image annotation default templates, you can now easily create your campaign and crowdsource annotation in your given images.
Skin blemishes, pimples or zits are the unwanted spots in photos. If you have a huge number of pictures that needs fixing, annotating the undesirable spots in faces will lighten your work. With this Facial Spots Detection template, annotation can be done effortlessly!
A JavaScript template where workers will draft a rectangular boundary in the spotted zit or red/brown spots. Boundaries can be resized by adjusting the “Resize” slider left or right. With the annotated pimples, blemishes and red/brown spots, now you can easily remove them and make the photos of your clients look perfectly beautiful!
Hair issues such as stray and fly-away hair are very common and often unavoidable in your photographs. Outlining the hair by annotating the edges of the hair in a photo will ease your work in removing the unwanted stray and fly-away hair. Use this default template to your campaign.
If your campaign also requires outlining the hair segmentation and hair growth direction, this should be the template to use! Another JavaScript template where workers are required to emphasize the hair of a given photo by drawing a polygon or nodes. You can just update the instruction, if necessary, and upload your images through a CSV file.
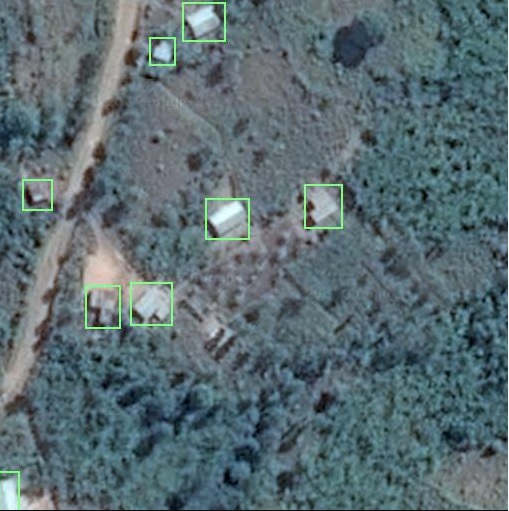
Google Map Satellite view shows images of buildings, houses and infrastructures. To easily distinguish which one is the building or a house, this annotation tool can locate them by drawing a box/rectangle around the image. Drawing can be done using a mouse. Position the mouse in the spotted building/house/infrastructure and press on hold the left button of the mouse and draw a box or rectangle around the image.
Example of few annotated images/buildings:
For Image Annotation campaign, you will be needing a CSV file to assign different images to each Worker. Your list of Image URLs can be placed in a CSV, and then attached to the campaign. You can choose how data from CSV is displayed to Workers (in order or randomly). Image URLs should be in the following format:
⇒ jpeg
⇒ png
Steps on setting up your CSV file is available here:
https://microworkers.com/csv.php
For this type of campaign, we highly suggest you submit your campaign under our Hire Group section. With the minimum number of participants allowed per campaign, you will have better control over the outcome. You may be able to target specific group to exclusively work on your campaign versus the general population. Under Hire Group section, you can assign more than 1 position to each worker up to unlimited.
Suggested groups:
MW: Best Rated Countries
MW: Data Services
MW: Top Performers
You might also be interested in the following related blog posts:
MW Default Templates for Artificial Intelligence (AI) Campaign Projects
Conducting Survey Projects in MW
Image Processing Project Ideas


